How to Write a Design Brief as a Digital Marketer
Working with designers can feel fun and exciting at first and then become a headache once you’re deep into a project that isn’t going as well as you had hoped.
This guide will help you:
- Give your colleague enough information.
- Think like a designer.
- Define what you want from your designer.
- How to write a design brief.
- Develop a communication plan for working together.
Designers’ brains often work differently than a marketer or entrepreneurs’ brains. Their education and background are likely quite different from yours. Their job is to make the best possible creative result, but they can’t read your mind. To get the results that you want, knowing how to write a design brief with clear and organised communication, plus a well-defined project will go a long way.
When you can do the above, good design happens more quickly and with much more fun. A good working relationship with a designer takes time, but if you use this guide you will be able to communicate better and avoid the difficult client fee, (yes that is a thing.) Your designers will prioritise you’re needs and work faster because they enjoy working with you and they understand what you need.
Give your Designer enough information
Providing the big picture is like providing a map, rather than a blindfold.
Just like with any project getting organised is more than half the battle. In my experience, spending significant time getting helping your new colleague to get a lay of the land before starting a project, saves a lot of time in the end. When I plan out exactly what I want to achieve in a project before diving in, I don’t need to pivot as often, and less effort is lost.

Working with “The Creative Type”
Not all designers fit within the stereotypes of “the creative type.” Designers and creative people are a varied and multifaceted bunch and I don’t want to unfairly over-generalise. That being said, good designers are passionate people who love their work and can sometimes get distracted or convinced by exciting ideas that don’t fit the brief you wrote.
You can help keep your designer on track by providing both the big picture and the specifics. Be clear about the goals from the beginning. Be consistentabout how you provide information and when you want changes, be sure to document it clearly so that there is a master list to refer back to.
The first thing your designer is going to need is an introduction to your company. The amount of information that this needs to include depends on whether this person is working for you freelance for the first time or if this person is working in-house and is already familiar with the company.
For the new designer or freelancer:
If you’re working with a new freelancer, how to write a design brief is slightly different. They are going to need a solid introduction to the company. In this case, your design brief is going to be a zip package full of files.
THE WRITTEN DESIGN BRIEF SHOULD INCLUDE:
- Your current marketing strategy– i.e. Where does your company position itself in the market? Who is your direct competitor, who is your customer, and what is the voice, mood, and tone of communication? Side note: If this customer is different than whom you need your designer to design for, you can clarify this a little later.
- A campaign or similar project that your company has published in the past that you consider successful, if you don’t have any of those, then share one that wasn’t successful and explain what didn’t work about it.
Now that you’ve given your new colleague a really thorough introduction to your company, it is time to share information about what you want them to focus on now. Yes, I said nearly ready. You may be wondering at this point why it is called a brief when it is so much information!
How to Think Like a Designer
Beyond how to write a design brief, you probably haven’t had an education around looking at and discussing images. You don’t want to be an “I’ll know what I want when I see it” kind of client; asking your designer to create image after image until magically they get it right. You want to be a client who can think a little bit like a designer. When in Rome, right?
Here is an exercise to think like a designer.
- Go to dribble, or Pinterest and search for something like “infographic”.
- Find 3-5 graphics that you like or strongly dislike. They don’t need to reflect your brand or product, this is just for practice.
- Write 10 bullets for each and what you like, dislike, or simply notice about each one. 10 bullets might feel exhaustive and you might run out of things to write down, however, that is the idea. Push yourself!
- Get specific, spot, and describe the details, mood, themes, and relationships you see.
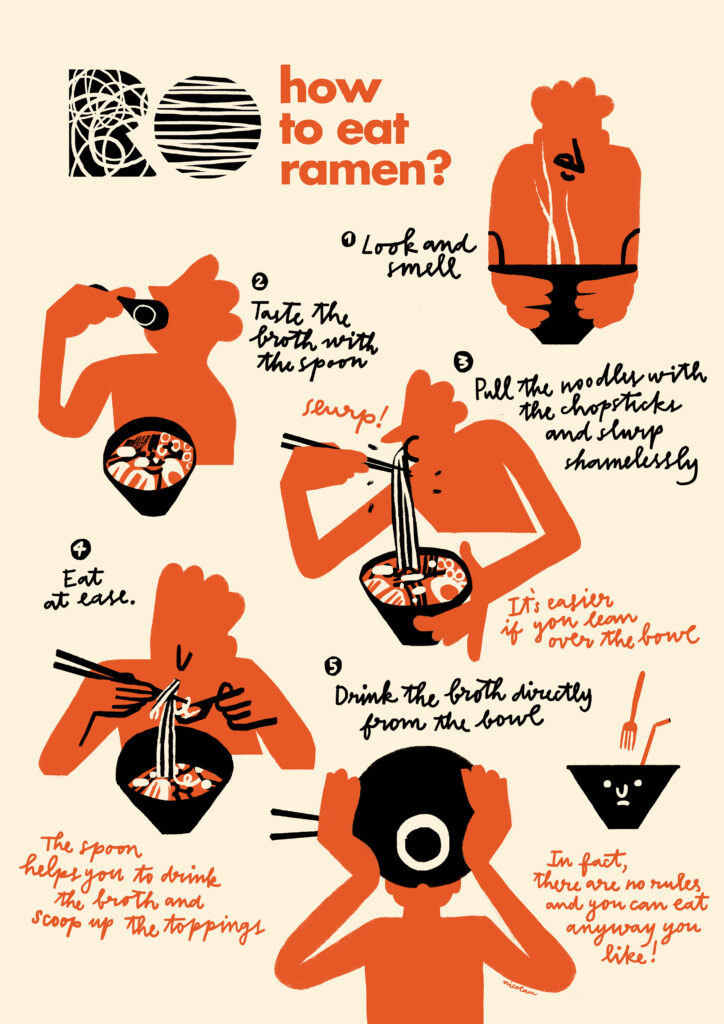
EXAMPLE EXERCISE #1

1.I love the striking red and black used here, and that the beige of the background reminds me of the color of ramen noodles. 2.I like that the bumpy hair that tells me this is the same character repeated over and over through the poster3.I love the details in the soup, something about it reminds me of a mid-century modern illustration.4.I like that the handwritten font matches the quick spontaneous and textured feel of the illustrations, but I think it’s too condensed and hard to read, especially for a non-native English reader.5.I like that the characters are dynamic and that there are so many of them, but I don’t feel like there is enough breathing room between each character, and the order of which images I should look at doesn’t feel intuitive.6.I feel like the logo and the characters don’t have a clear hierarchy and compete for my attention.7.I like the last character who is drinking the last bit out of the bowl. The shift in perspective feels fresh and feels like a smart finish.8.The face on the solo bowl aesthetically fits, but it draws my eye to it and I’m not sure if it is needed. 9.I like the text, however, maybe the suggestions in red could be removed (except for the last one) to create more negative space.10. I like that this could be printed beautifully, but would look just as strong digitally.
Previous slide
Next slide
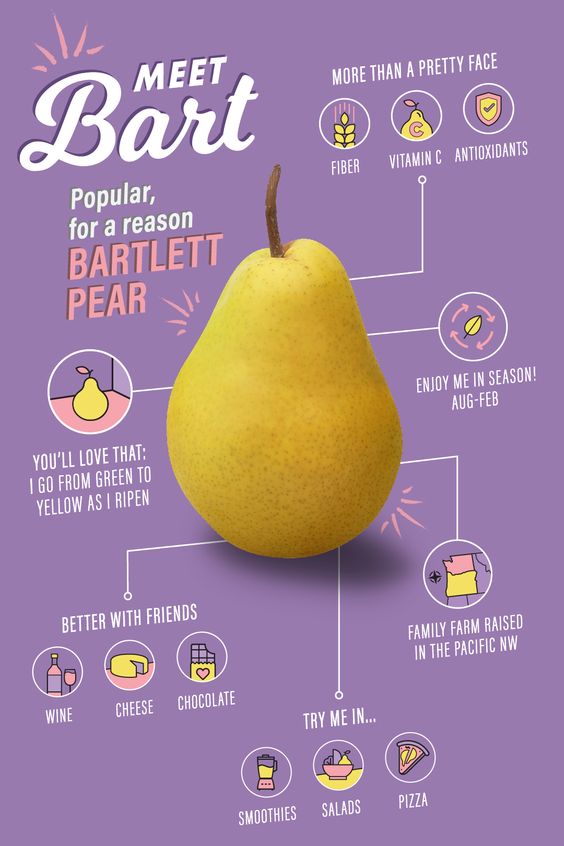
EXAMPLE EXERCISE #2
1.I like the limited color palette. The almost chartreuse pear pops against the lavender background which caught my eye immediately. The light pink and spots of that same chartreuse within the small graphics around the pear lead my eye around the infographic nicely.2.The scale of the items in the design feels balanced and active. 3.The lines and text coming out from the pear are on an angle making the graphics appear to be moving back into space which makes the poster look slightly 3D instead of flat.4.The text and graphics are super short and to the point which makes it easy to read5.The white all-caps font gets pretty small, but it is still legible. I wonder if it is accessible for people with sight impairments.6.I like how fresh the poster looks without relying on stereotypical food freshness graphics like drops of water or green and blue tones, but I wonder if the poster is appetising enough, or if it is borrowing too heavily from trends in fashion advertisement. 7.This infographic feels like it is targeted to young women who are health conscious, and who are doing their own grocery shopping. I’m picking up on this because of the benefits outlined as much as the color palette. 8.The drop shadow under the pear looks slightly off of the perspective of the graphic lines, but this didn’t bother me until I was staring at it.9.The font used for Bart has a slightly retro vibe to it which is exaggerated by the shadow behind it. It reminds me a little bit of a handprinted sign.Click Here10.The texture in the little highlight lines above the B in Bart and on either side of the pear is super subtle but is the only texture in the design aside from in the pear itself.Click Here
Previous slide
Next slide

Well done! I know that wasn’t easy and you might be feeling a bit insecure about your answers. That’s okay! With practice, it will get easier and the more your confidence will grow.
Define what you want from your designer.
Before you ask your designer to get to work you need to be clear about what you want them to do.
“I need graphics for an easter campaign I want to run on Instagram” is not clear enough. You need to know very explicitly what outcome you will be satisfied with, and that means being able to articulate what you like and don’t like, which is where the previous exercise comes in handy.
If you’re thinking, well isn’t it the job of the designer to figure out what the design should look like? I understand, especially if you haven’t successfully worked with a designer before, the process might feel opaque and like they are image-generating machines. The truth is they’re not and they need a lot of instructions to make your ideas come to life.
Research other campaigns and visuals that are similar to the campaign you need to run and repeat the exercise from above.
If you send this level of reference information to your designer they will be able to get inside your head and won’t need as many revisions.
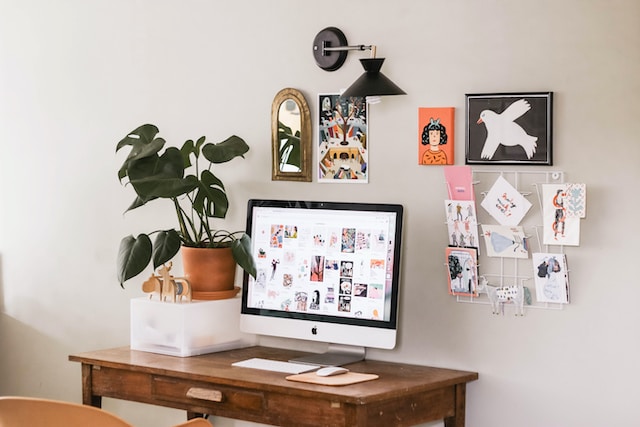
Additionally, you can put together a mood board with a color palette, imagery, fonts, and aesthetics that fit your campaign. Always, always walk your designer through the mood board and describe why you included each image and what they should pay attention to, and what is irrelevant. If you can’t have a call, record a video and e-mail it to them. Often this process will help you get clearer on what you want.
What goes in the design brief:
Now that you know what you want, you can start putting together the design brief that is specific to the campaign you need to run.
HERE IS WHAT YOUR BRIEF NEEDS TO INCLUDE:
- The goal of this campaign: What are the KPIs you will be tracking? What is the tactic? Are you running a sale or a giveaway? Are you inviting people to sign up for a newsletter? What tactic you will use to achieve the goal and what are the behaviors or actions your customer will perform, that you will track?
- Who is the target demographic? Are you targeting a more specific group than your whole customer base? Is there a specific pain point you are focusing on in this campaign?
- Where these design assets will be used: Instagram? Pinterest? A Print ad?
- Technical details of what you need, I.e. file formats, ed uses, and what flexibility might be needed in the future. If you don’t know these details, that’s okay! Just communicate to your designer how you want to use the files and they will be able to make their best suggestions of what you need.
- Similar campaigns that either you or a competitor have run. You can use your results from the exercise above.
- Mood board: creating mood boards can be fun, but they can lead the designer in the wrong direction if they don’t include notes.
- Project description: Write the project description with descriptive words to clarify what you want to communicate to your customers. Think about your descriptive words in the same way that you think about long-tail keywords. An imprecise description contains single words like whimsical, luxury, or fun, as each of those words could describe thousands of completely different images.
Now it’s time to put it all together.
Your brief doesn’t need to be pretty, but it does need to be organised. Create a PDF document with the project description from above as well as links to assets (photos, logos, graphics, etc.) you want your designer to use. Then, create a zip folder with all of the files (brand guidelines, onboarding pdf, example materials, etc.) compiled, and clearly labeled.
Lorem ipsum dolor sit amet, consectetur adipiscing elit. Ut elit tellus, luctus nec ullamcorper mattis, pulvinar dapibus leo.
BONUS: Develop a communication plan for working together.
YOU’RE NEARLY THERE NOW!
The last step in planning and briefing your designer is to create a communication plan. You can avoid disappointments and late projects by creating a communication plan and clarifying expectations.
HERE ARE SOME KEY POINTS TO ASK YOUR DESIGNER:
- How often and at what stages will they need feedback from you?
- How quickly do they need to receive feedback from you to meet their deadlines?
- How do they like to receive feedback? Video call? Recorded video? Written feedback?
If you can, push for video calls for feedback sessions, it keeps a good mood, plus it’s generally easier to talk about visuals than write about them. During Video calls write down notes for important details and changes that you would like your designer to make. Be sure to share those notes after the call. When you do this, you both have a reference point to be sure that the project is staying on track, and moving in the right direction.
Congratulations!
If you have gotten this far, and followed all of my suggestions, you have set yourself up for an excellent and satisfying working relationship with your designer. I cannot emphasise enough how much more successful your project will be, because you have done so much prep work. Learning to think a bit like a designer and communicate in their language about what you need will boost their creativity and ability to create excellent design work for your campaign because as you know, teamwork makes the dream work, baby!


